Are you looking for some Thanksgiving Bible craft ideas that you can do with your children? Perhaps you are a Sunday school or Children’s Church leader and you need some fun things to do with your students. Here are 5 Thanksgiving Bible [1] craft ideas that you may want to try. I have broken them down into appropriate age level for each project for your convenience.
 [2]When doing crafts with children, especially in church, you should be sure that each child has an old set of clothing that they may wear for crafting or a smock that they may wear over their clothing so that they will not soil their good clothes. In addition to this, other supplies and materials are included with each project below.
Preschool – Grade 2 crafts:
Thanksgiving necklace or bracelet
What you need for each necklace or bracelet:
- Some Thanksgiving foam beads (I found some online at http:// www. orientaltrading.com/api/search?Ntt=thanksgiving+bracelet
- Alphabet letters (I found some online at http:/ /www. orientaltrading.com/wonderful-wood-alphabet-lacing-beads-a2-60_5006-12-1.fltr?Ntt=bead+letters)
- 8 to 15 inches of thin ribbon
Instructions:
- Allow children to choose 7 favorite foam beads
- Help children find the letters for their first name from the alphabet beads
- Help children build necklace or bracelet by stringing the beads onto the ribbon. Do one foam bead then one letter and alternate until finished.
- Tie a square not onto the ribbon so the beads do not fall off
Thanksgiving Colored Pages Book
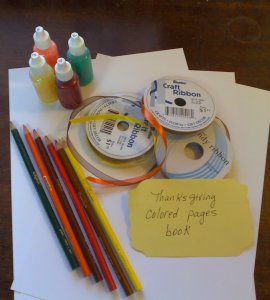 [3]This is a project that you can do with the children over several weeks leading up to Thanksgiving time. It will require some pre-planning on the part of the leader, but will be fun for the children.
What you need for each book:
- Colored pencils or crayons
- Autumn colored ribbon (three 4” pieces)
- Glitter glue (if you are a brave leader)
- Pre-printed pages … download some free from www .free-coloring-pages.com/thanksgiving.html
- 2 pieces of white cover stock (for front and back covers)
- 3 hole punch
Instructions:
- Have each child color several pages. Decorate with a little glitter glue and set aside to dry.
- Leader: Help each child print Thanksgiving verse on front cover (you may need to do it for the very young children) Suggested verses may be chosen from our page here: Thanksgiving Bible Verses [4]
- Gather the pages together and assemble into a book with covers
- Three hole punch the pages … tie a ribbon into each hole to bind the book together
- Put child’s name on back of book
Grade 3 – Grade 5
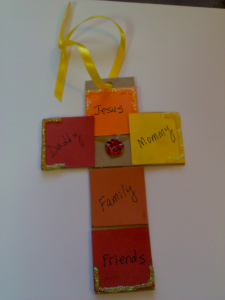
Thank You Cross Hanger
 [5]What you need for each cross hanger:
- One 1 ½” x 4” strip of brown card stock
- One 1 ½” x 6” strip of brown card stock
- Five 1 ½” x 1 ½” squares of autumn colored card stock (red, yellow, beige, orange)
- Single hole punch
- 12” thin ribbon (autumn color)
- Medium tip marker
- Glue
- Glitter glue (yellow or gold)
- Scissor
- One sparkly embellishment or large sequence (red)
Instructions:
- Hole punch the larger brown strip of card stock at the top about ¼ inch from top
- Glue the smaller brown strip to the larger one into the shape of a cross
- On each small square write one word for which you are thankful (be sure each child includes “Jesus” on one of the squares)
- Glue the small squares onto the cross – Jesus at the top, two on each of the horizontal brown strip and the other two vertically down the cross.
- Use the glitter glue to embellish each corner of the cross
- Glue the sparkly embellishment just below “Jesus” in the blank brown space.
- Tie the ribbon so that the cross may be hung.
Grade 6 – High School
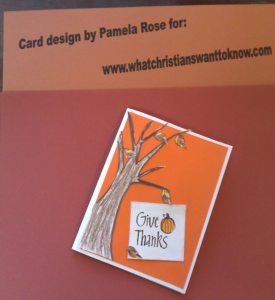
Give Thanks Card
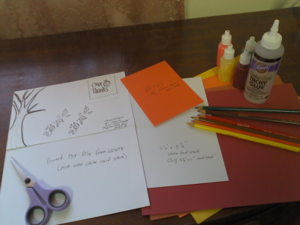 [6]What you will need for each card:
- The PDF art cutout from here: PDF Give Thanks Card [7] (select File, Print and highlight the top half of page and then print onto white card stock)
- One 4 ¼” x 5 ½” piece of white card stock (this is ½ of and 8 ½ x 11” piece of card stock)
- One 3 3/8” x 5 ¼” piece of colored card stock (autumn color: red, yellow, orange, light brown)
- Scissor
- Colored pencils
- Glue
- Glitter glue (optional)
- Color the tree trunk and branches, leaves and pumpkin that are on the PDF that you printed
- Fold the white card stock in half to make a card
- Glue the colored card stock to the white card (leaving white edge visible on all sides)
- Cut out the tree, larger leaves and “Give Thanks” square
- Glue the tree into the lower left corner of the color stock that you already glued to the white card.
- Glue some leaves onto the branches of the tree
- Glue the “Give Thanks” square to the right of the tree near the bottom of the card
- Glue one leaf onto the “Give Thanks” square wherever you like
- Write a Thanksgiving verse inside the card. You may choose one of ours: 15 Thanksgiving Quotes [9]
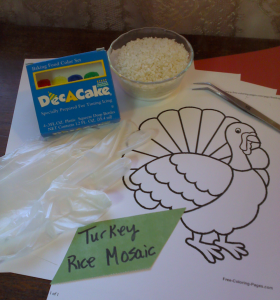
Turkey Rice Mosaic
Note: This project requires at least one day of prep for the colored rice.
What you will need for each mosaic:
- The Turkey that may be printed onto white card stock. Go to www .free-coloring-pages.com/thanksgiving.html to find the turkey
- About 2 cups of uncooked white rice (long grain is best but any will work – you can also use small pasta for this project)
- Food color set (red, yellow, blue, green)
- Plastic glove (unless you want very colorful hands)
- Glue
- Tweezers
- Some plastic disposable spoons
- Small paint brush
- (Wear gloves for this) At least one day prior to doing the project, color the rice and allow to dry. Simply place the rice into a glass cup and put a few drops of food color onto it. Then use disposable spoon to mix the rice until it is the color you desire. Add more color for brightness. (To make brown mix together equal amount of red, blue, and yellow food color in a small bowl or cup) You will need the following colors of rice:
- Small amount of red for the caruncle (that thing hanging on the throat)
- Small amount of yellow rice (this is for the feet and beak)
- Medium amount of white rice (no color for part of the tail feathers)
- Medium amount of dark brown (for body and some tail feathers)
- Medium amount of light brown (for neck and some tail feathers)
Allow the rice to dry in a safe place
- Have artist write a favorite “thankful” Bible verse below the turkey image.
- Put glue onto whichever part of the turkey you want to color first (don’t use too much glue or your paper will get wrinkly)
- Use the paint brush to spread the glue
- Drop colored rice onto the glued surface
- Press rice down to adhere to glue
- Use tweezers to remove rice from unwanted area
- Continue with next color until finished
- Allow to dry for at least 24 hours
The rice mosaic idea is from a fond childhood memory of my own and it is the most difficult of these projects. I hope that you are able to find at least one project that works for you and do it with your children or students to create some memories of your own.
Sources:
Thanksgiving necklace or bracelet:
www . orientaltrading.com/api/search?Ntt=thanksgiving+bracelet
www . orientaltrading.com/wonderful-wood-alphabet-lacing-beads-a2-60_5006-12-1.fltr?Ntt=bead+letters
Thanksgiving Colored Pages Book: www .free-coloring-pages.com/thanksgiving.html
Give Thanks Card: stamp design for leaves and “Give Thanks” © 2007 KPM for Studio G
Turkey Rice Mosaic: Turkey page from www .free-coloring-pages.com/thanksgiving.html
Project Photos by Pamela Rose


